3. Data Acquisition and Manipulation
5 minute read
The United Manufacturing Hub excels in its ability to integrate diverse data sources and standardize data into a unified model, enabling seamless integration of existing data infrastructure for analysis and processing.
Currently, data sources can be connected to the UMH through Benthos for OPC UA and Node-RED for other types.
The UMH includes 3 pre-configured data simulators for testing connections:
Connect OPC UA Data Sources
OPC UA, often complex, can be streamlined using our Benthos-based OPC UA connector accessible from the Management Console.
Create a Connection with the Management Console
After logging into the Management Console and selecting your instance, navigate to the Data Connections tab to view existing connections.
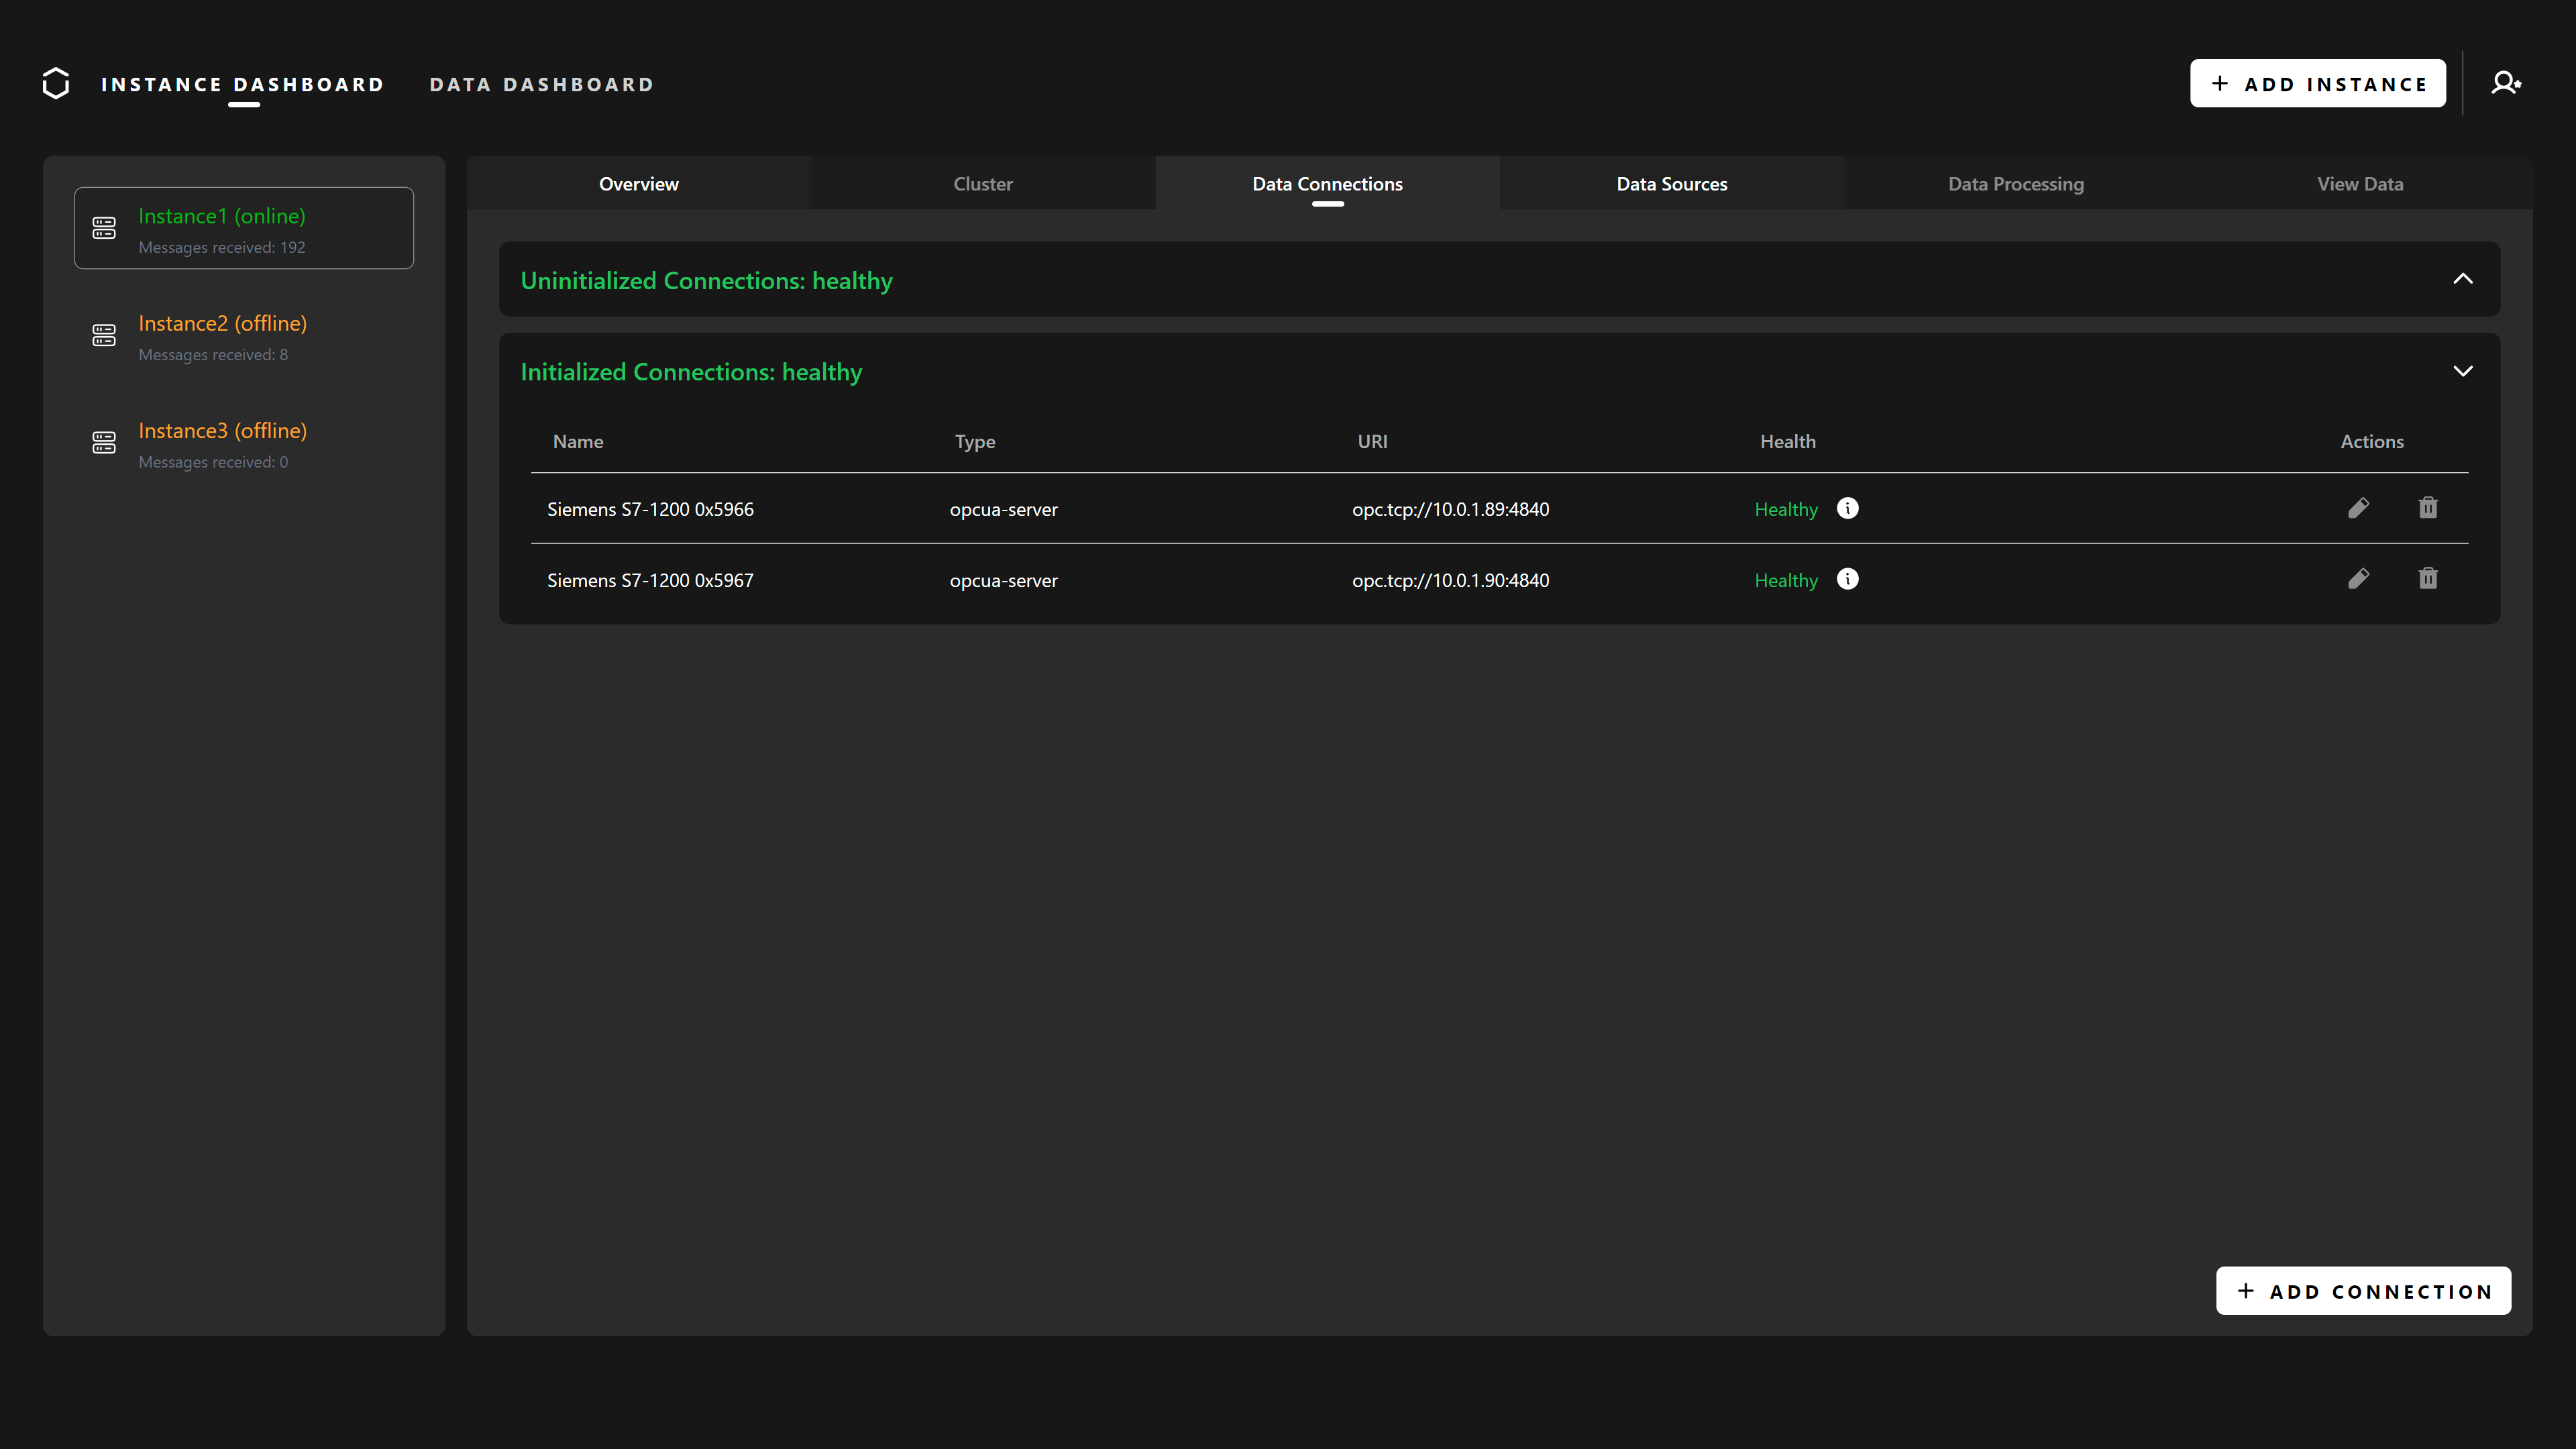
Uninitialized Connections are established but not yet configured as data sources, while Initialized Connections are fully configured.
The health status reflects the UMH-data source connection, not data transmission status.
To add a new connection, click Add Connection. Currently, the only option is
OPC UA Server. Enter the server details, including the unique name and address
with protocol (opc.tcp://) and port.
For testing with the OPC UA simulator, use:
opc.tcp://united-manufacturing-hub-opcuasimulator-service:46010
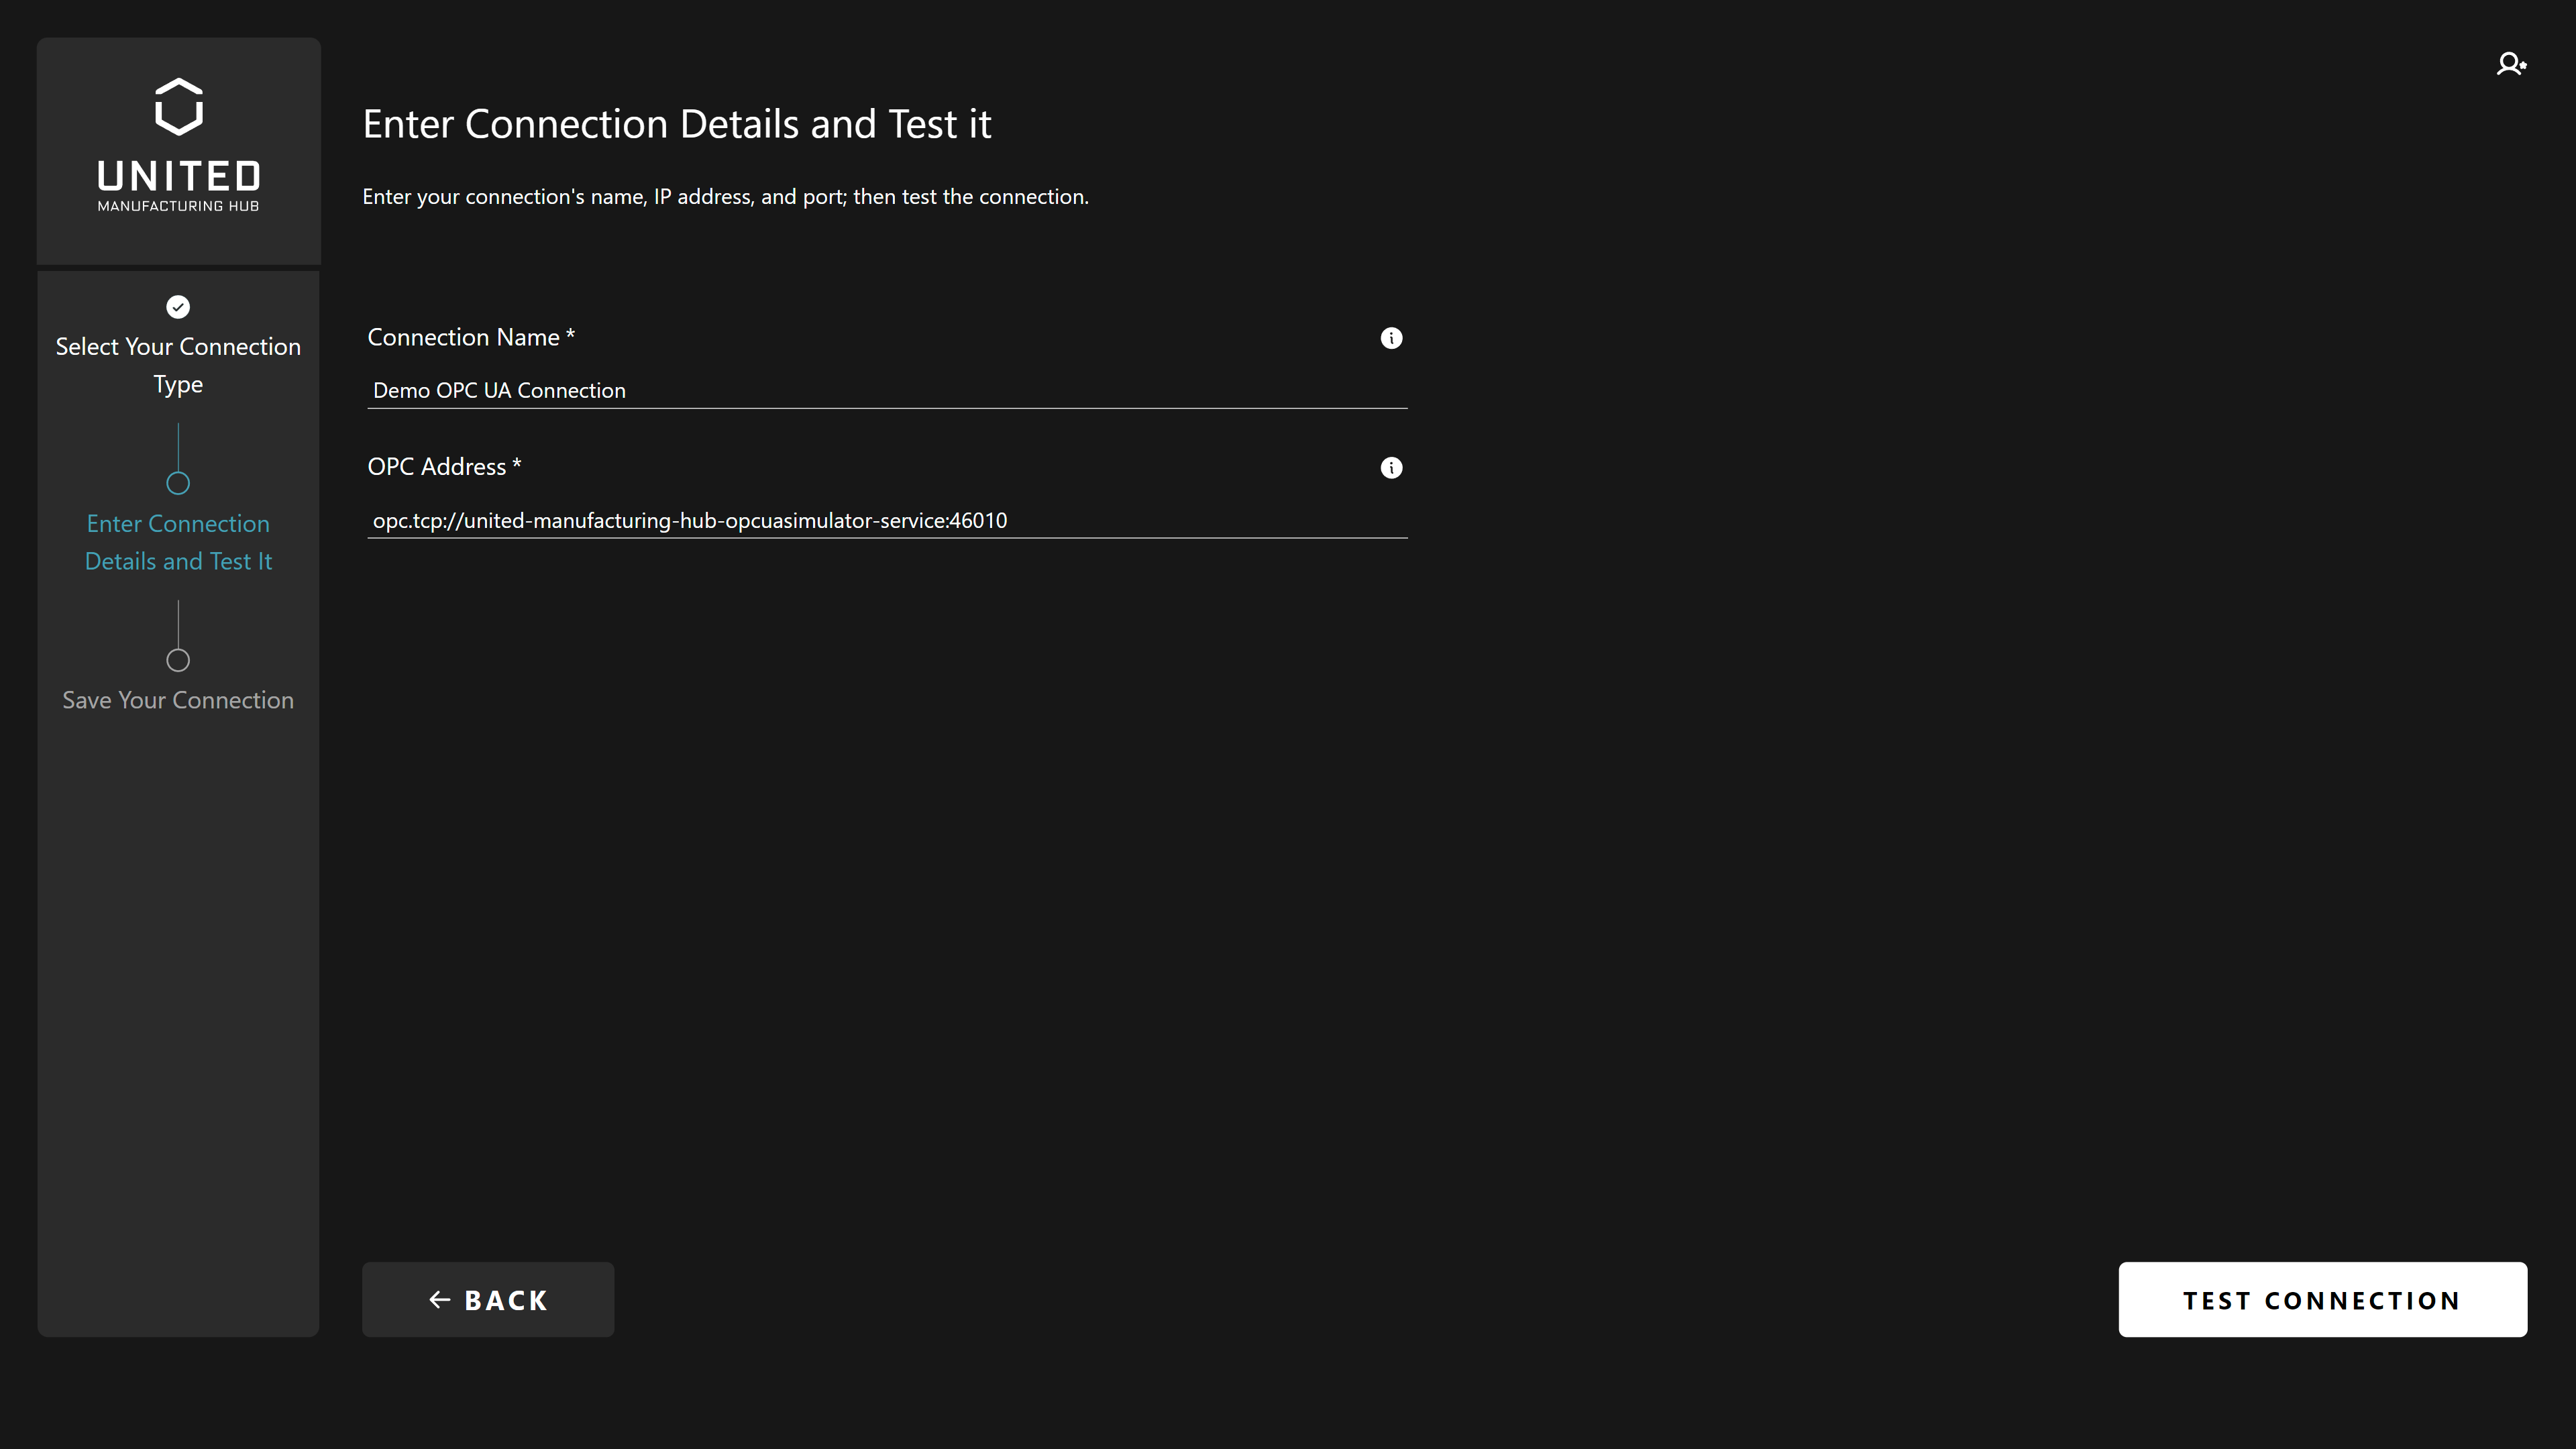
Test the connection, and if successful, click Add Connection.
Initialize the Connection
After adding, you must initialize the connection. This creates a new Benthos deployment for data publishing to the UMH Kafka broker.
Navigate to Data Sources > Uninitialized Connections and initiate the connection.
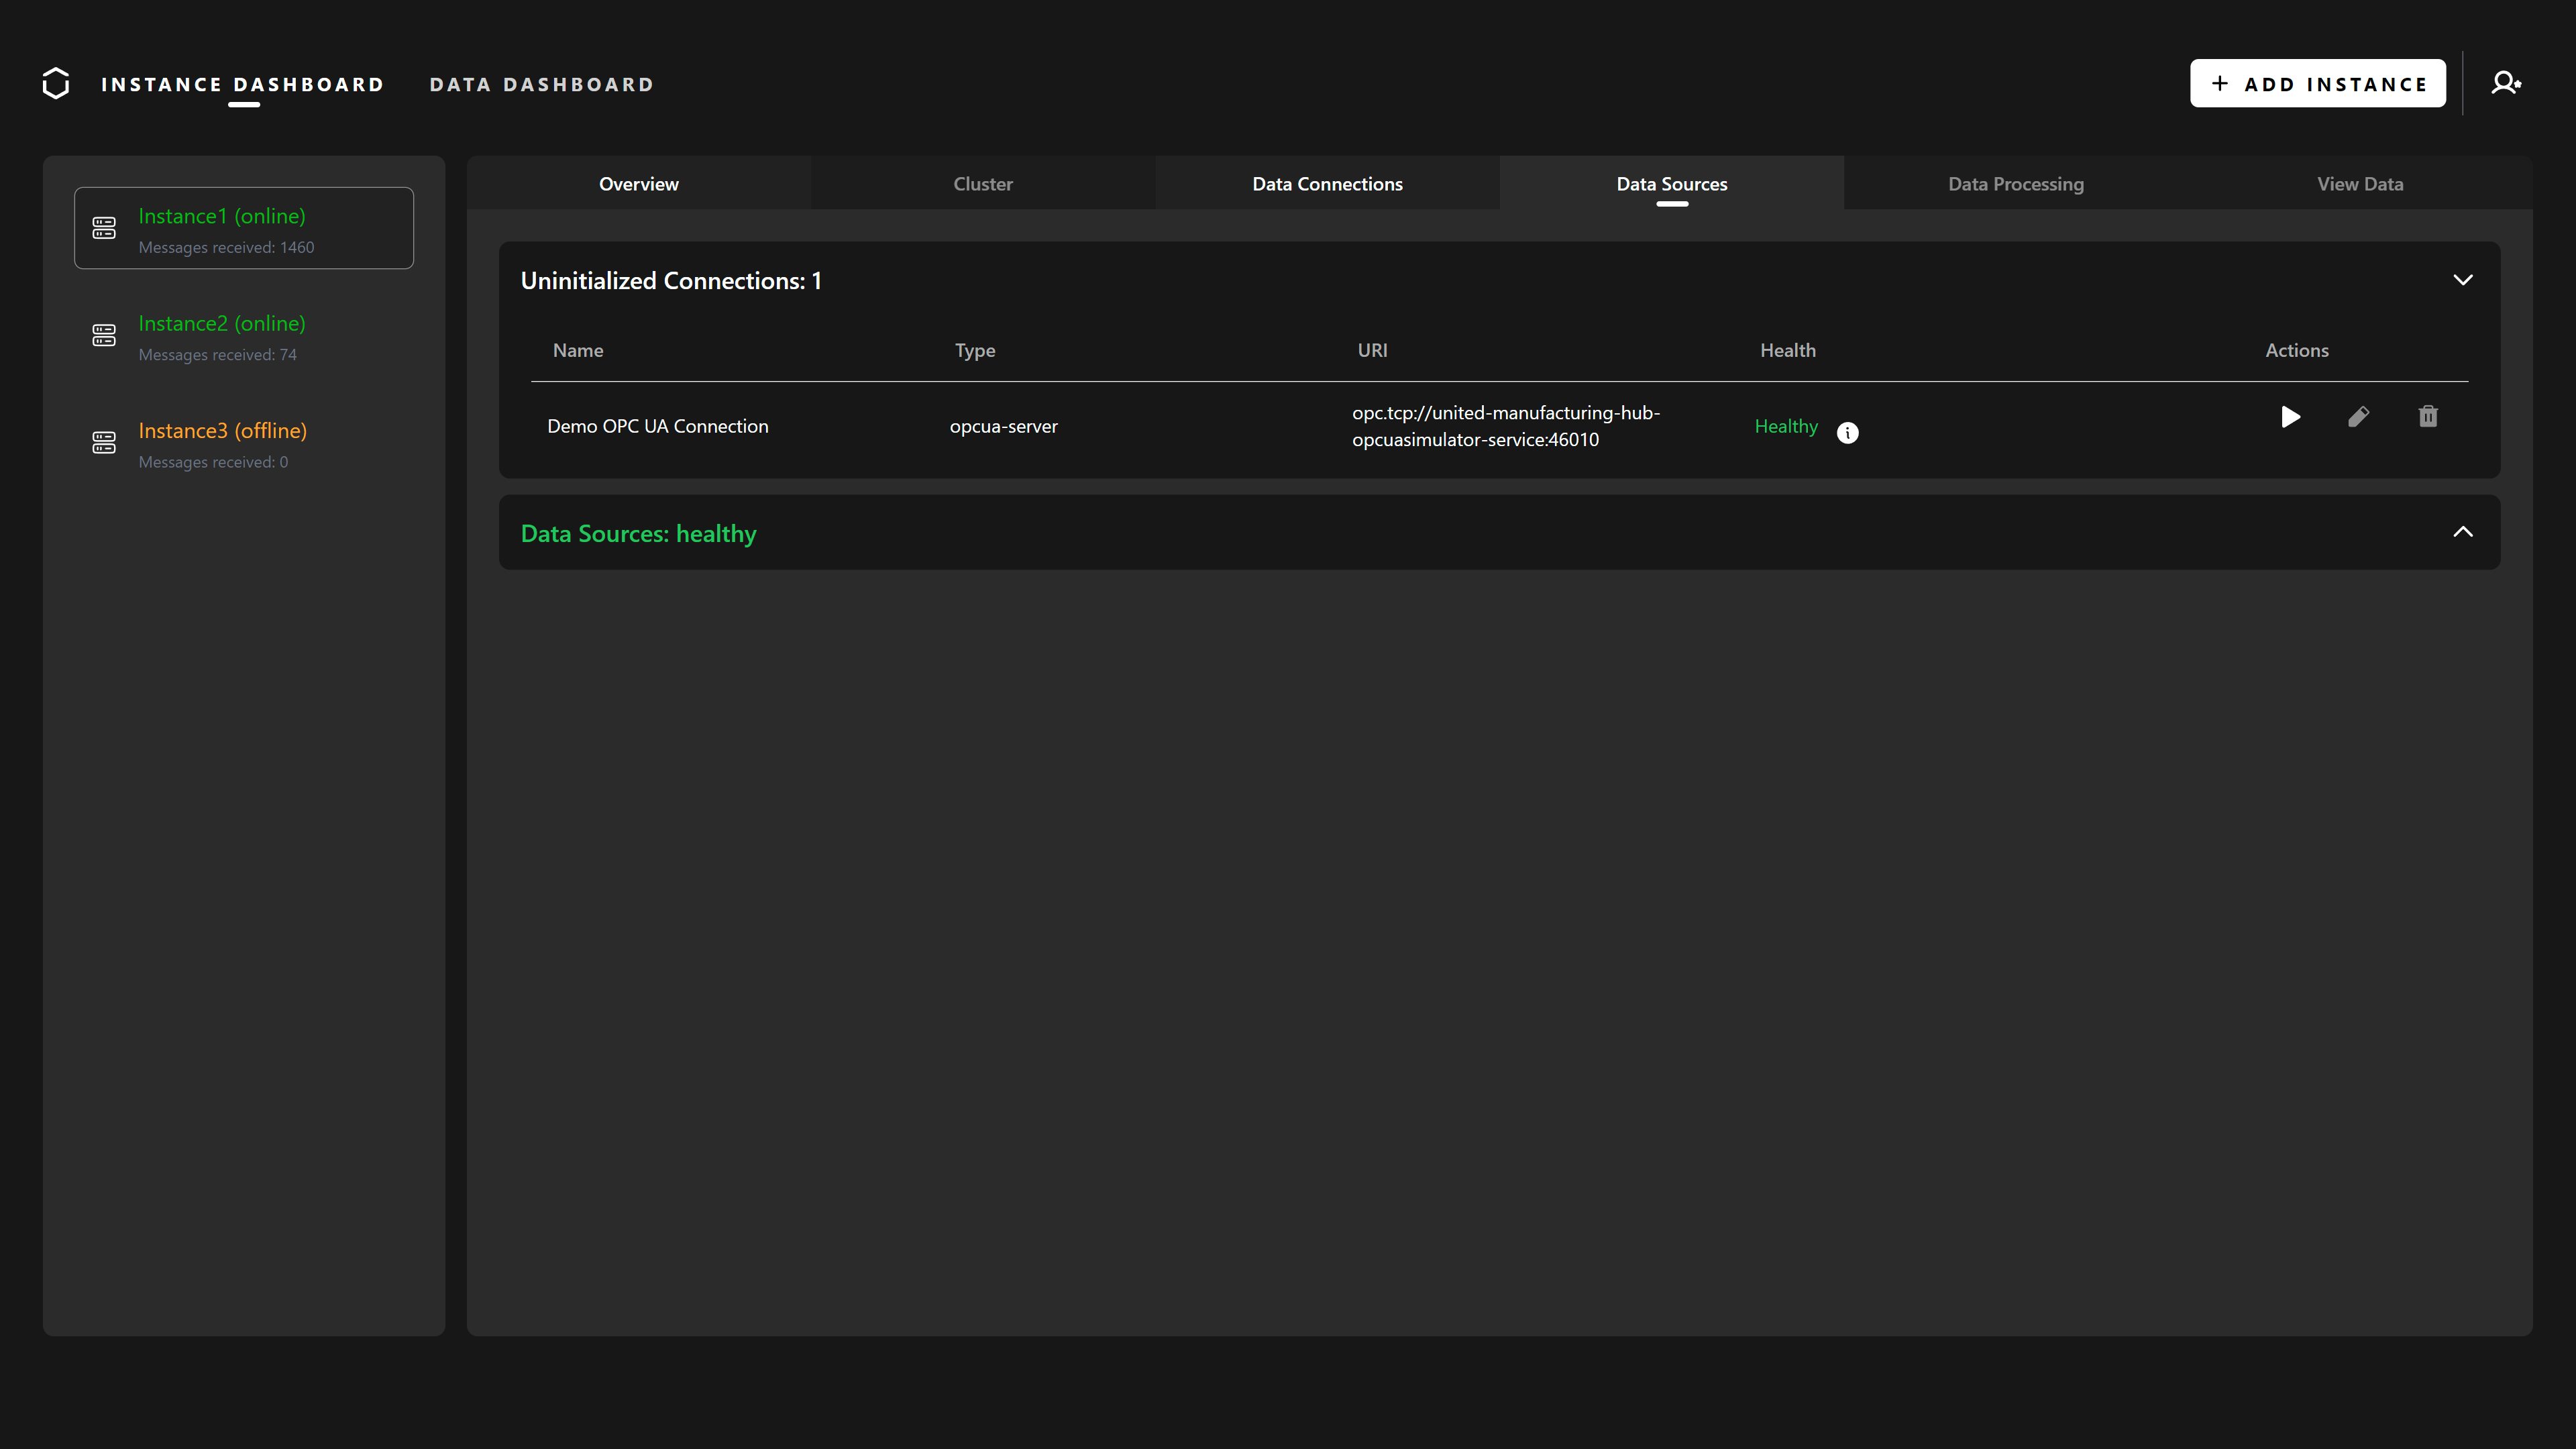
Enter authentication details (use Anonymous for no authentication, as with the OPC UA simulator).
Specify OPC UA nodes to subscribe to in a yaml file, following the ISA95 standard:
  nodes:
    - opcuaID: ns=2;s=Pressure
      enterprise: pharma-genix
      site: aachen
      area: packaging
      line: packaging_1
      workcell: blister
      originID: PLC13
      tagName: machineState
      schema: _historian
Mandatory fields are opcuaID, enterprise, tagName and schema.
Learn more about Data Modeling in the Unified Namespace in the Learning Hub.
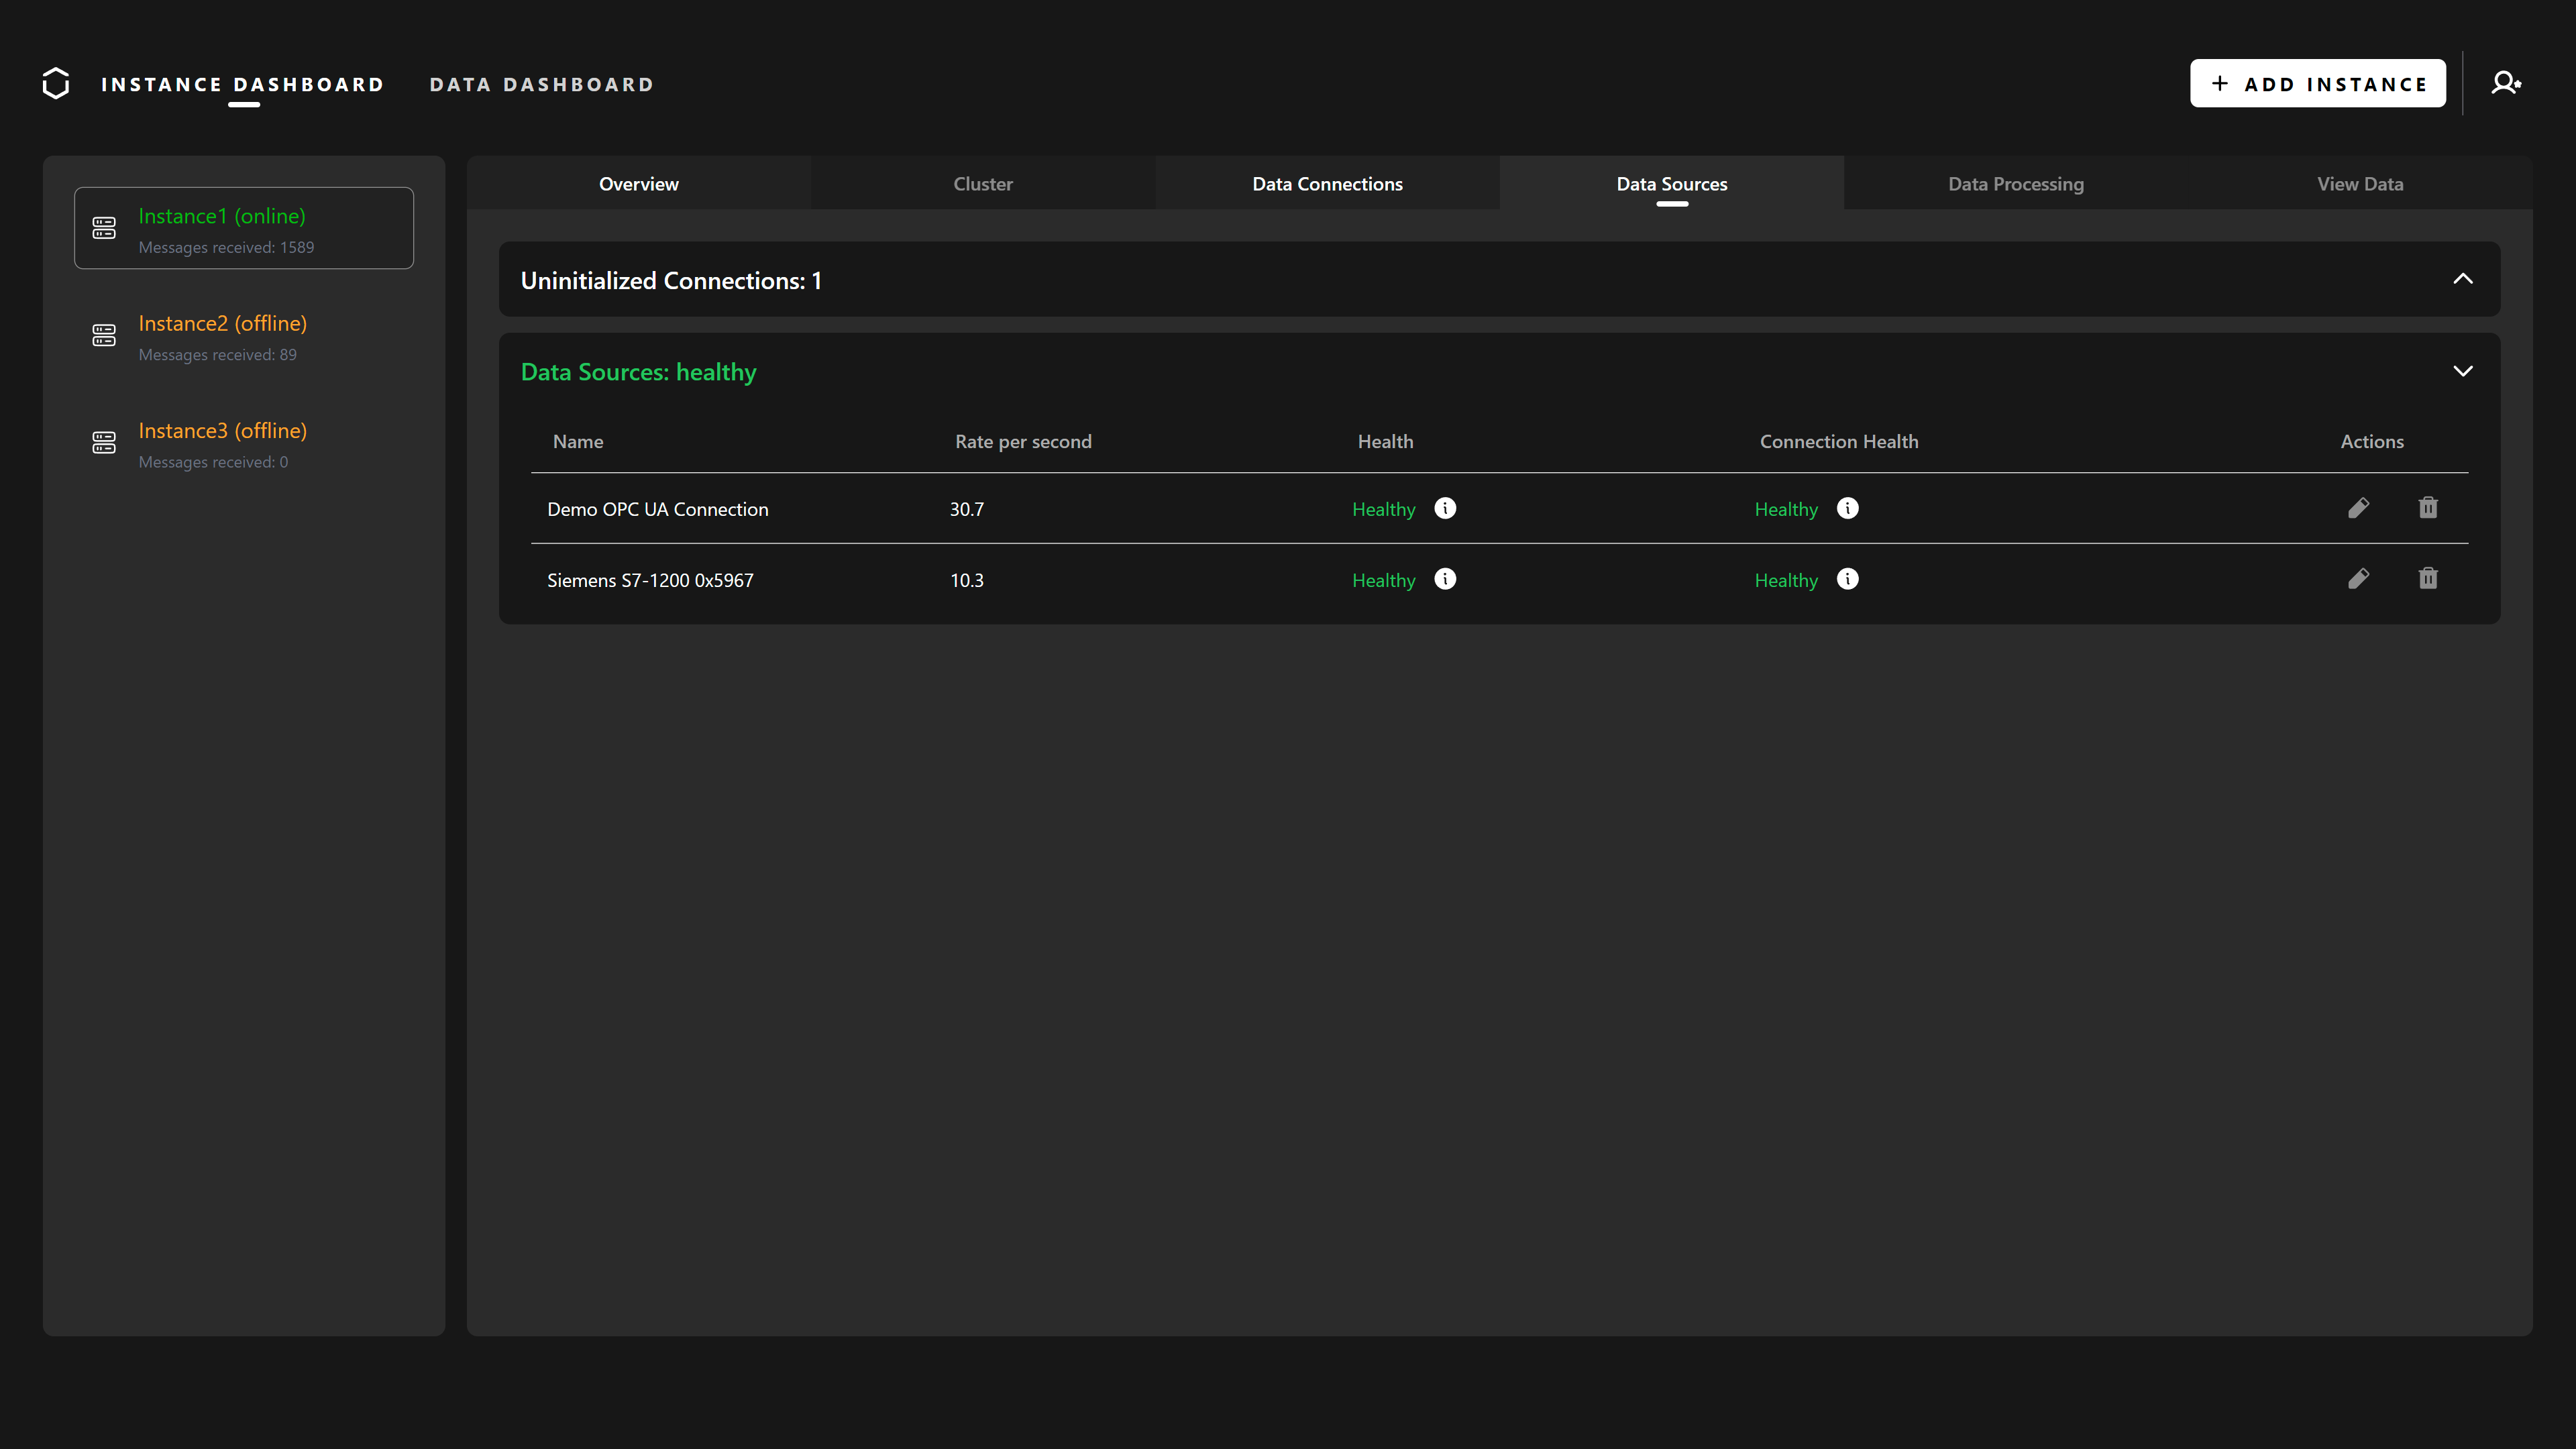
Review and confirm the nodes, then proceed with initialization. Successful initialization will be indicated by a green message.
The new data source will now appear in the Data Sources section.
Connect MQTT Servers
There are a lot of options to connect an MQTT server to the UMH. For this guide, we’ll use Node-RED to connect to the MQTT simulator and format data into the UMH data model.
To access Node-RED’s web interface, navigate to:
http://<instance-ip-address>:1880/nodered
Replace <instance-ip-address> with your UMH instance’s IP. Ensure you’re on the
same network for access.
Add the MQTT Connection
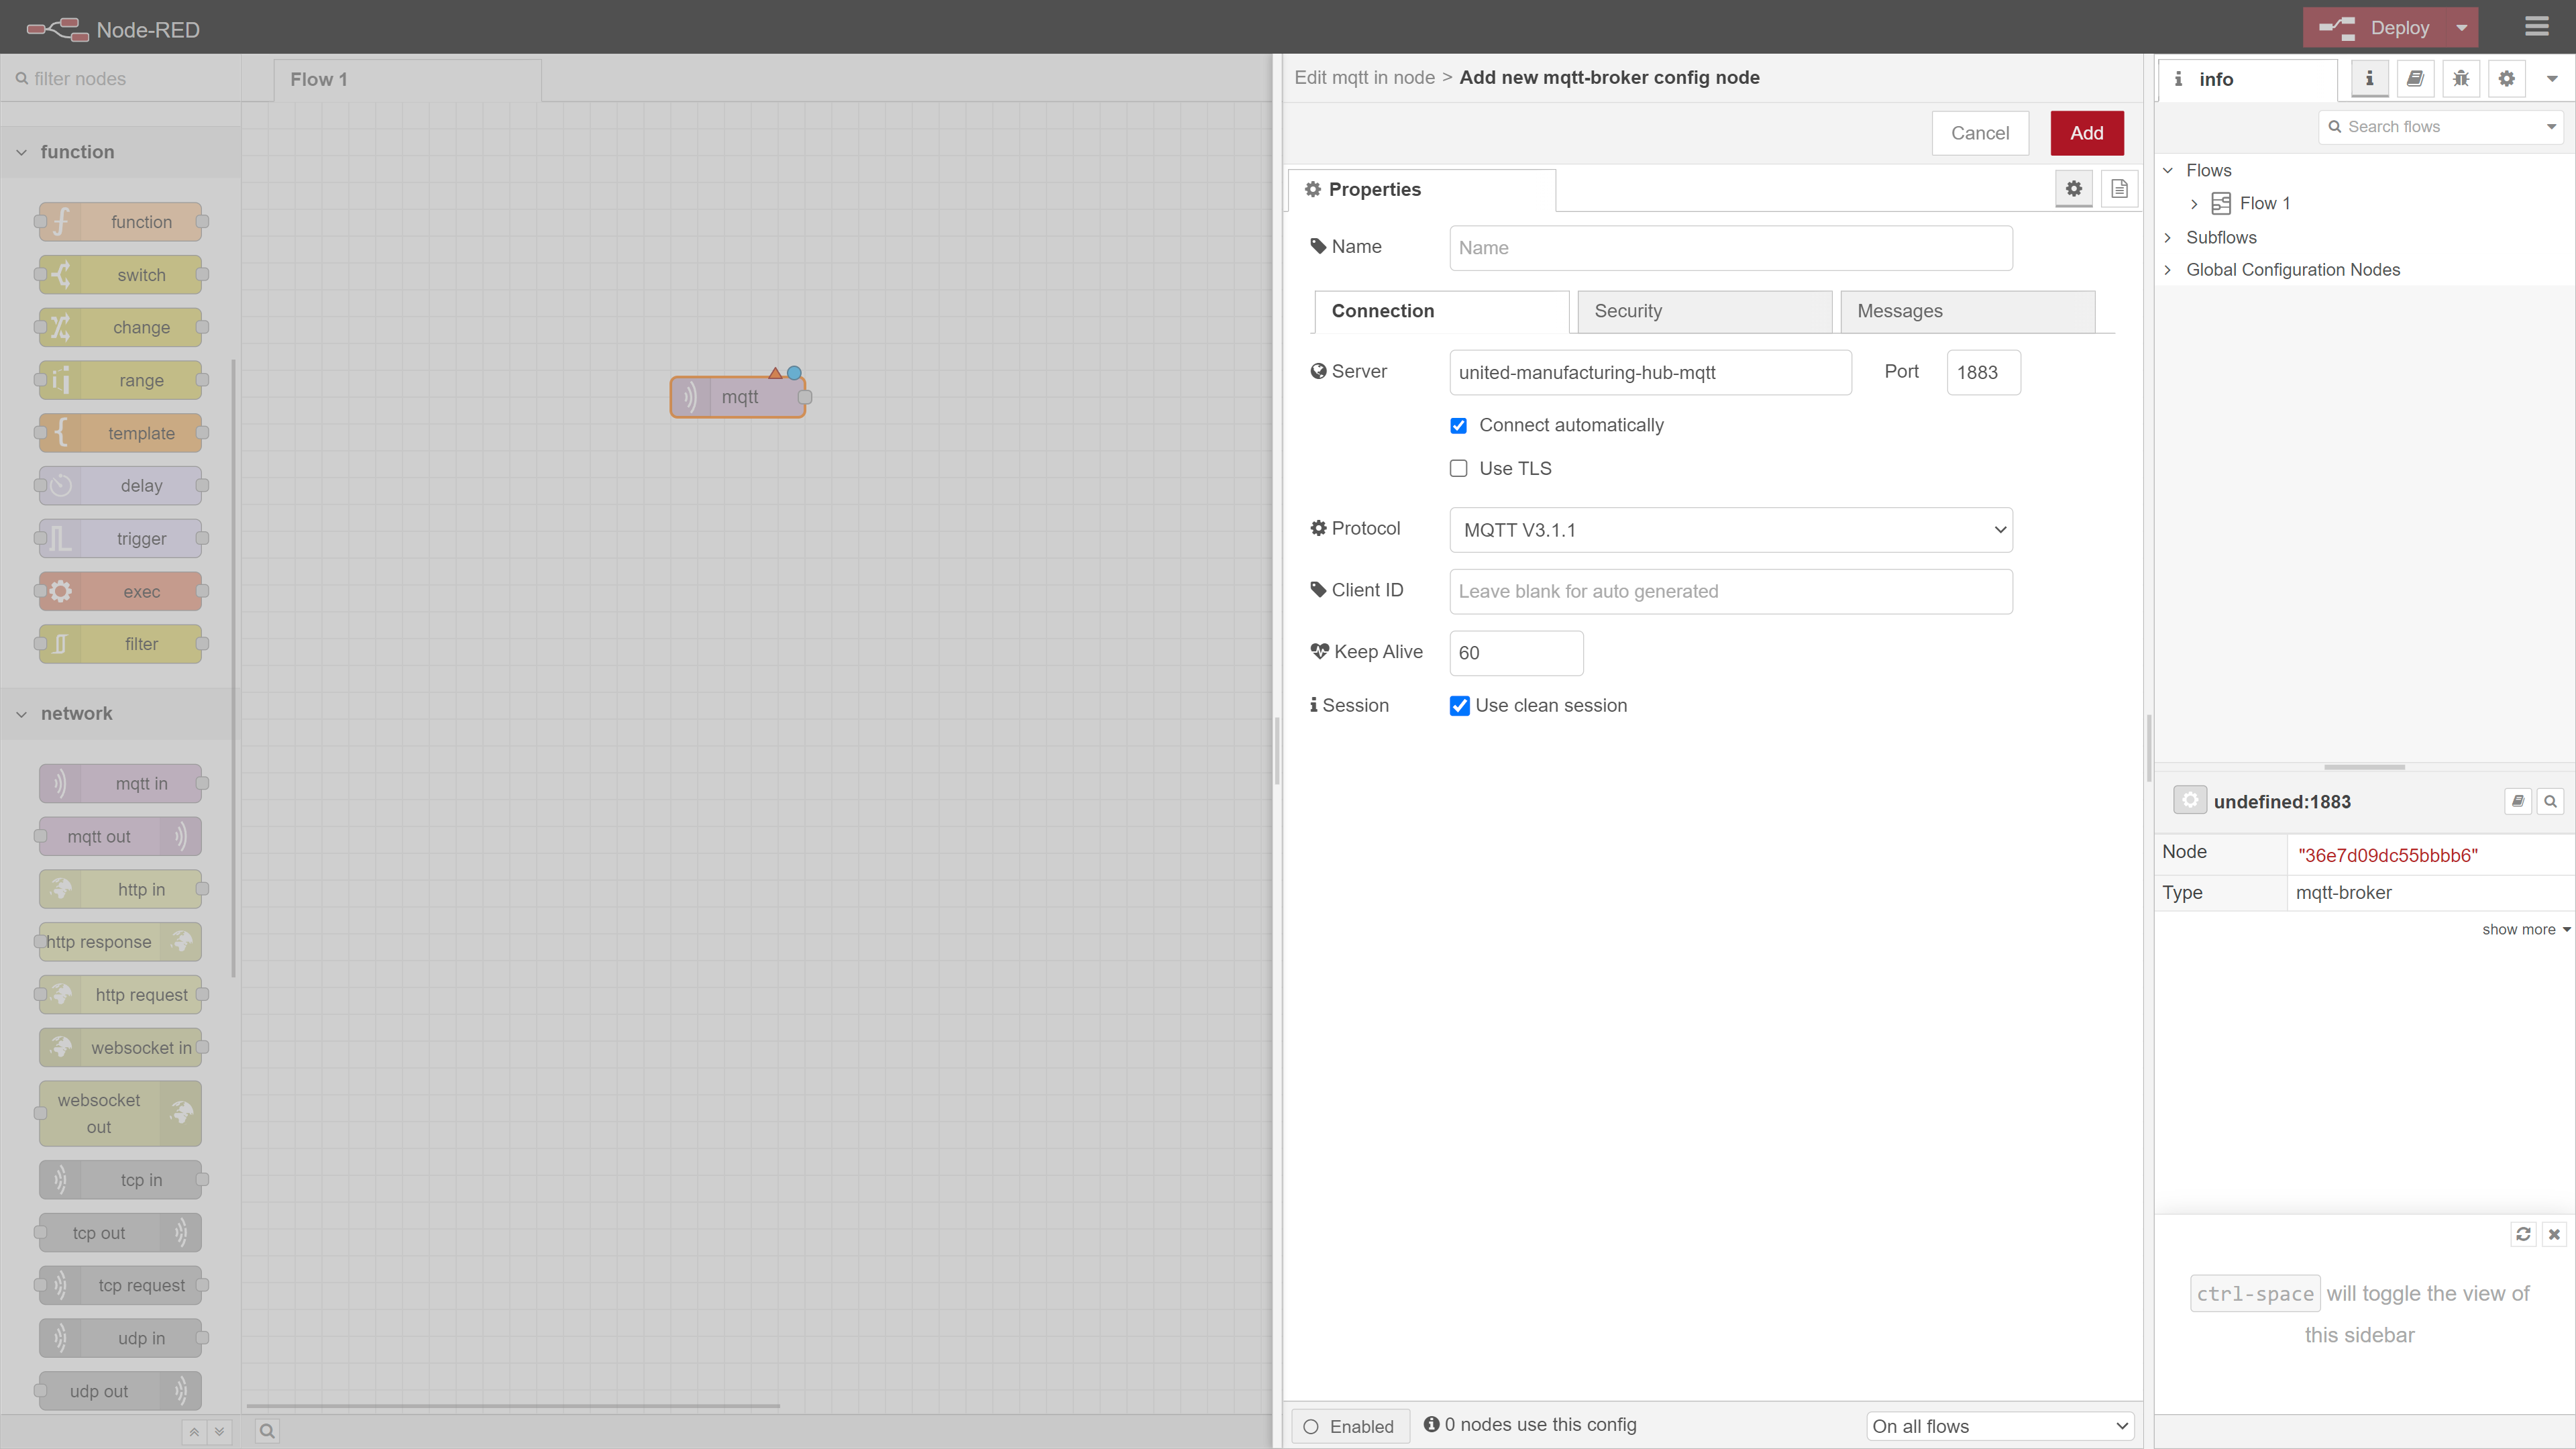
In Node-RED, find the mqtt-in node from the node palette and drag it into your flow. Double-click to configure and click the pencil button next to the Server field.
Enter your MQTT broker’s details:
- Server: united-manufacturing-hub-mqtt
- Port: 1883
For the purpose of this guide, we’ll use the UMH MQTT broker, even though the data coming from it is already bridged to Kafka by the MQTT Kafka Bridge. Since the simulated data is using the old Data Model, we’ll use Node-RED to convert it to the new Data Model.
Click Add to save.
Define the subscription topic. For example,
ia/raw/development/ioTSensors/Temperature is used by the MQTT Simulator.
To test, link a debug node to the mqtt-in node and deploy. Open the debug pane by clicking on the bug icon on the top right of the screen to view messages from the broker.
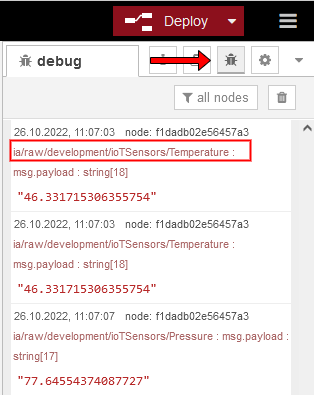
Explore Unified Namespace for details on topic structuring.
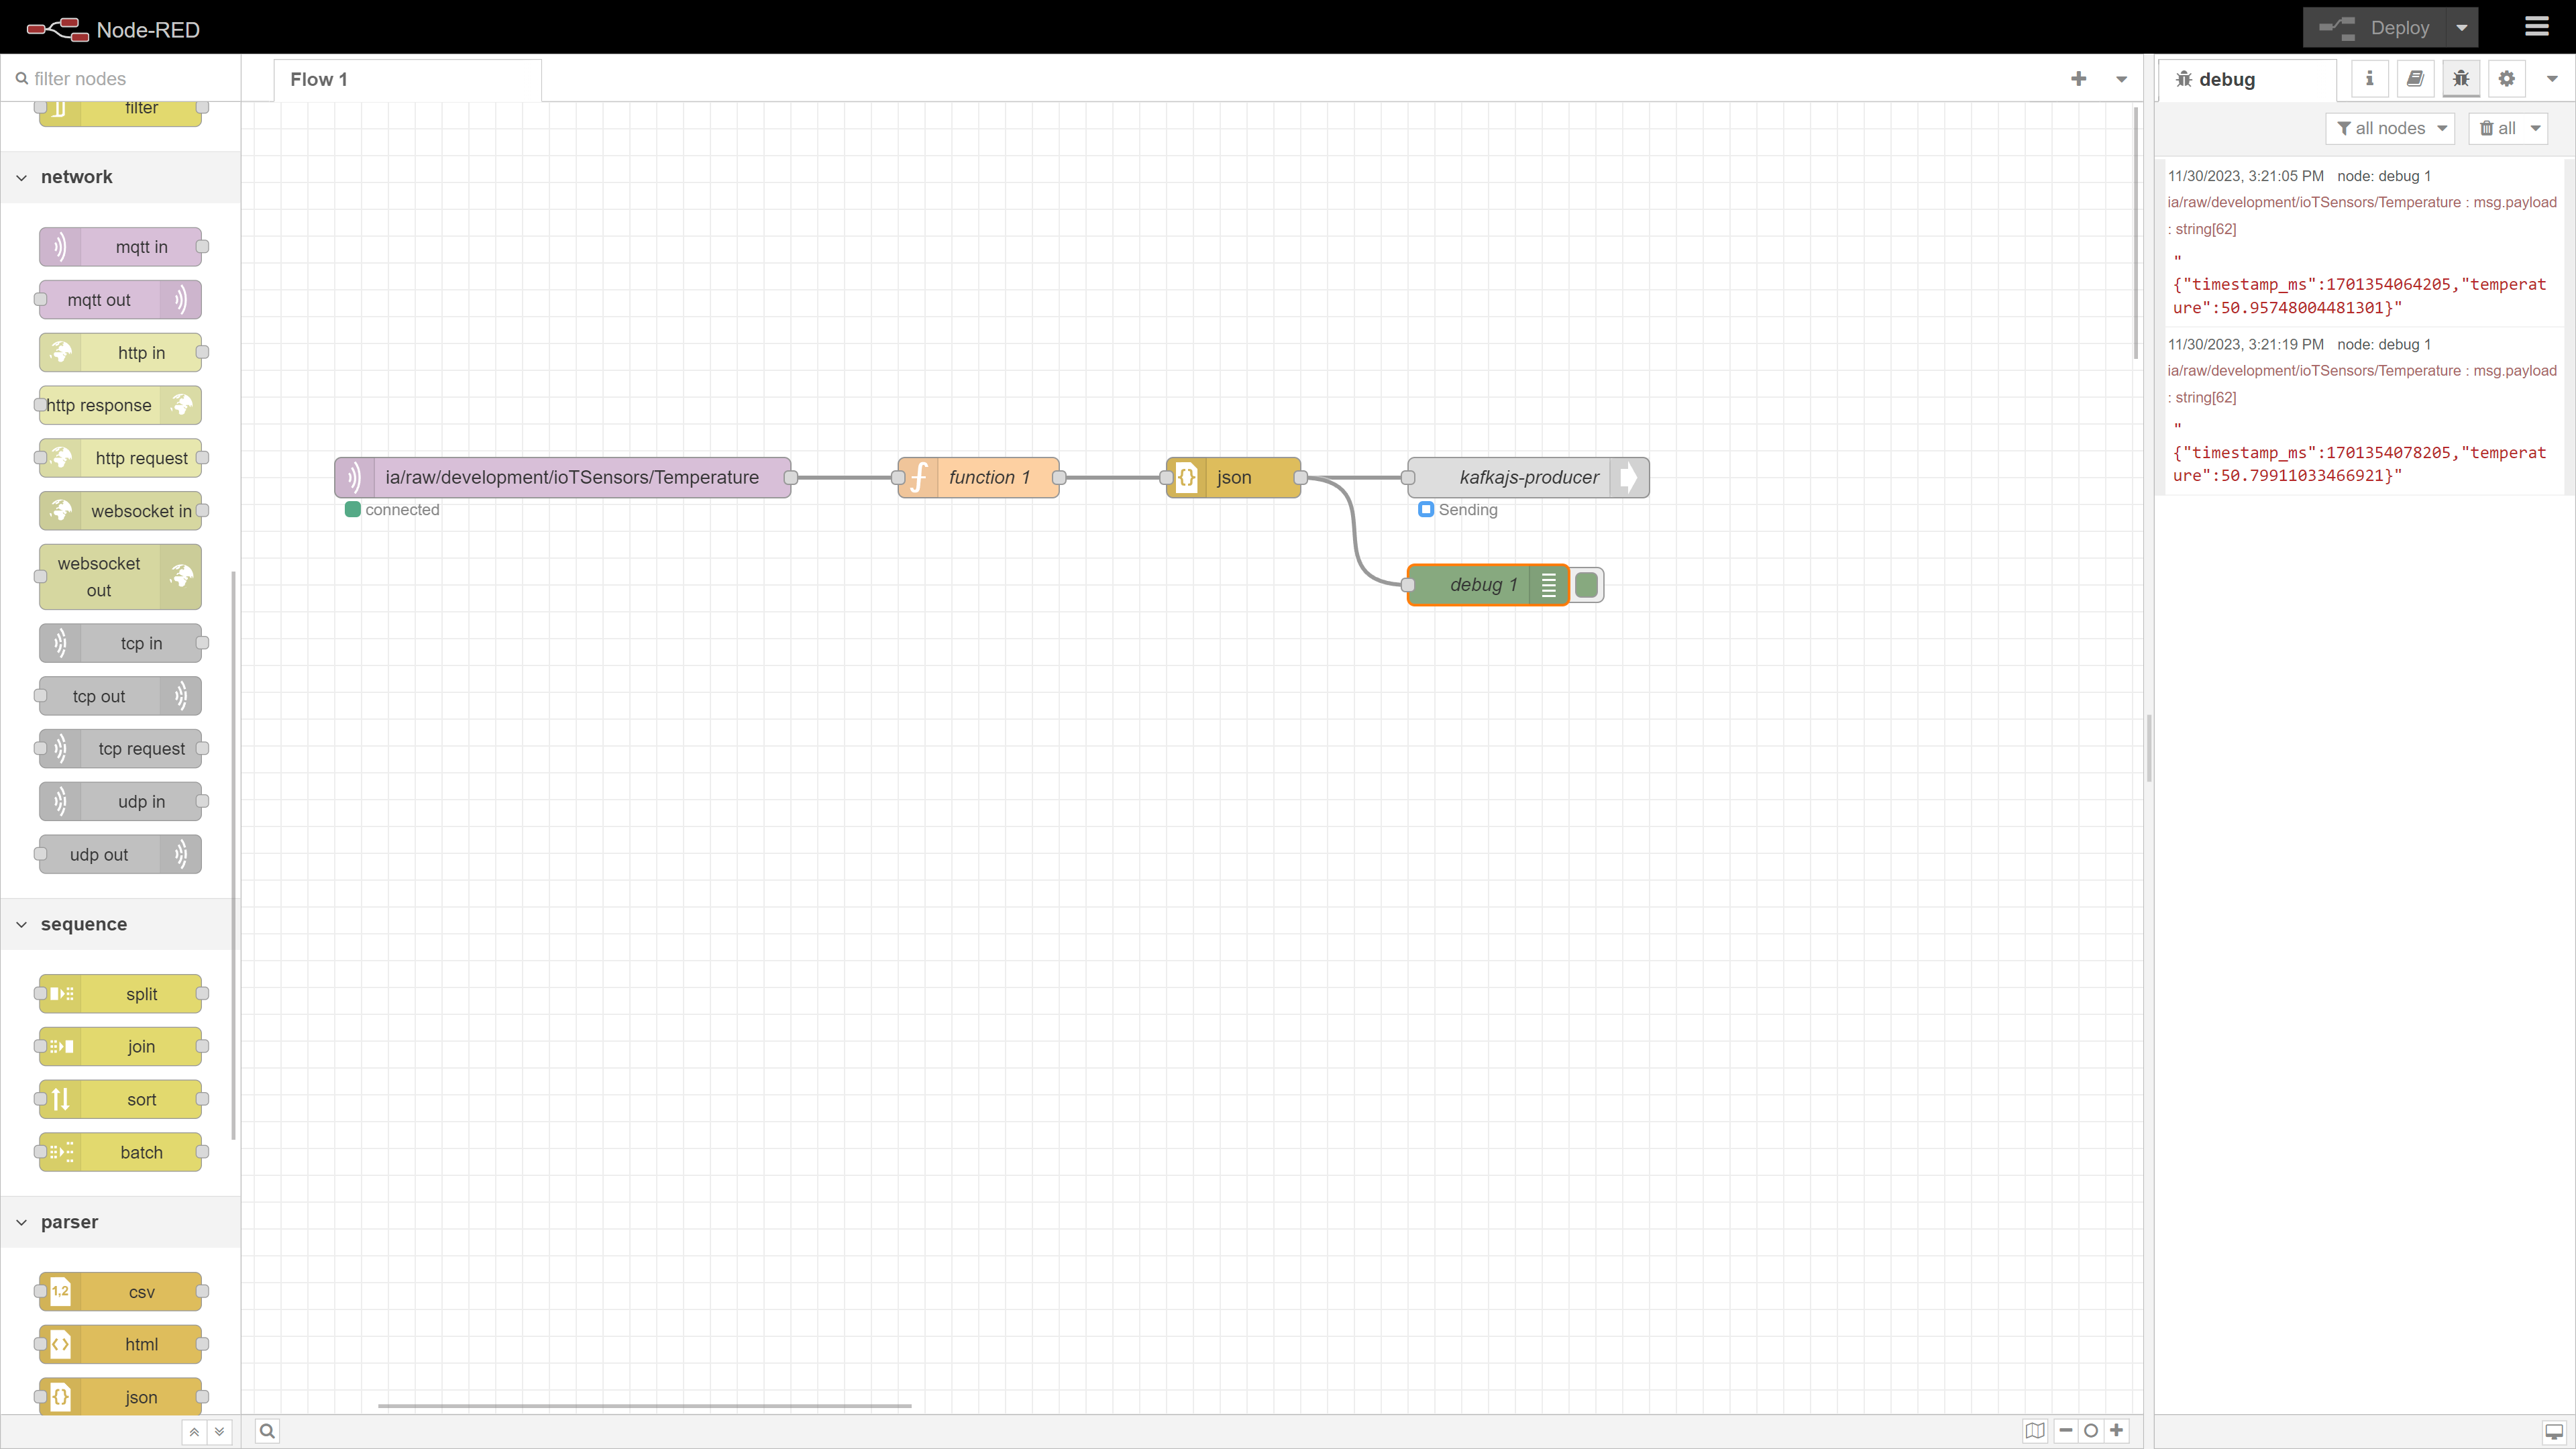
Format Incoming Messages
Use a function node to format raw data. Connect it to the mqtt-in node and paste this script:
msg.payload = {
    "timestamp_ms": Date.now(),
    "temperature": msg.payload
}
return msg;
Finalize with Done.
Then, connect a JSON node to the function node to parse the object into a string.
This function transforms the payload into the correct format for the UMH data model.
Send Formatted Data to Kafka
For this guide, we’ll send data to the UMH Kafka broker.
Ensure you have node-red-contrib-kafkajs installed. If not, see How to Get Missing Plugins in Node-RED.
Add a kafka-producer node, connecting it to the JSON node. Configure as follows:
- Brokers: united-manufacturing-hub-kafka:9092
- Client ID: nodered
Update to save.
Structure Kafka topics according to UMH data model:
umh.v1.<enterprise>.<site>.<area>.<line>.<workcell>.<originID>.<schema>.<tagName>
Example topic for this tutorial:
umh.v1.pharma-genix.aachen.packaging.packaging_1.blister.PLC13._historian.temperatureCelsius
To learn more about the UMH data-model, read the documentation.
Click Done and deploy.
Optional: Add a debug node for output visualization.
Connect Kafka Data Sources
Kafka data sources can be integrated with UMH exclusively through Node-RED.
To access Node-RED’s web interface, navigate to:
http://<instance-ip-address>:1880/nodered
Replace <instance-ip-address> with your UMH instance’s IP, ensuring you’re on the
same network for access.
Before proceeding, make sure the node-red-contrib-kafkajs plugin is installed. For installation guidance, see How to Get Missing Plugins in Node-RED.
Add the Kafka Connection
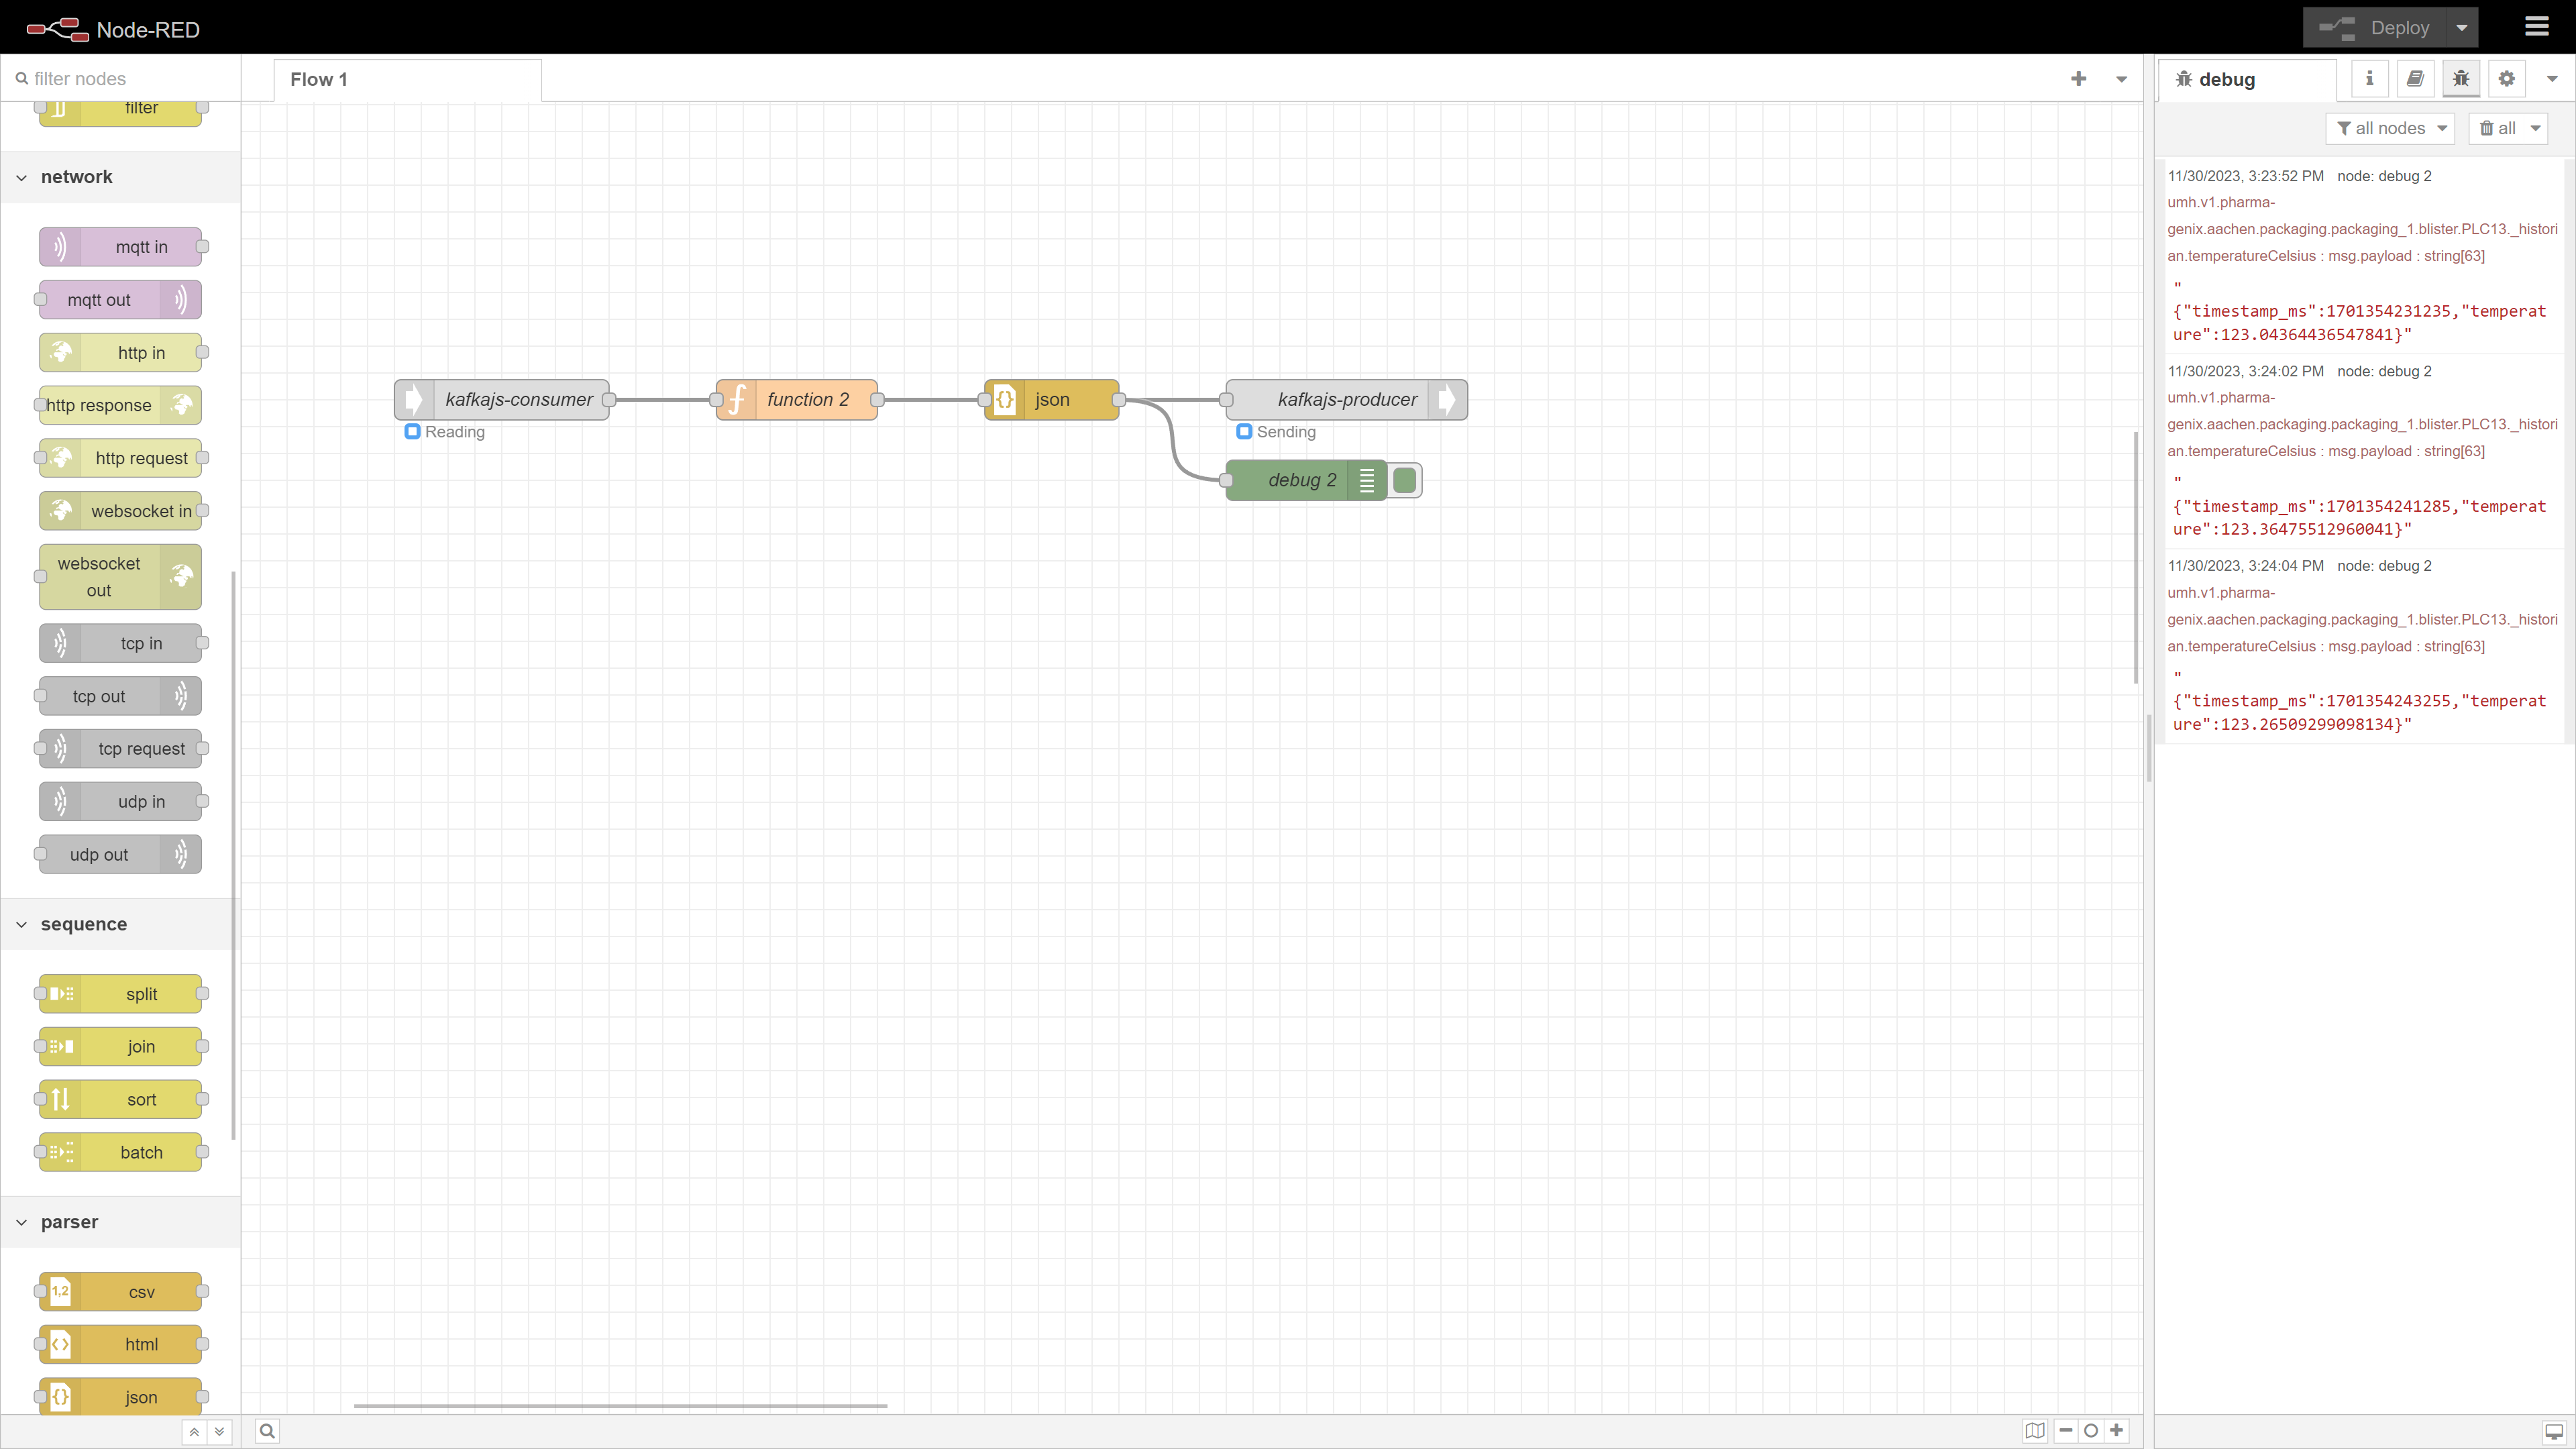
In Node-RED, locate the kafka-consumer node and drag it into your flow. Double-click to configure and click the pencil button beside the Server field.
If you have followed the guide, the kafka client should already be configured and automatically selected.
Enter your Kafka broker’s details:
- Brokers: united-manufacturing-hub-kafka:9092
- Client ID: nodered
Click Add to save.
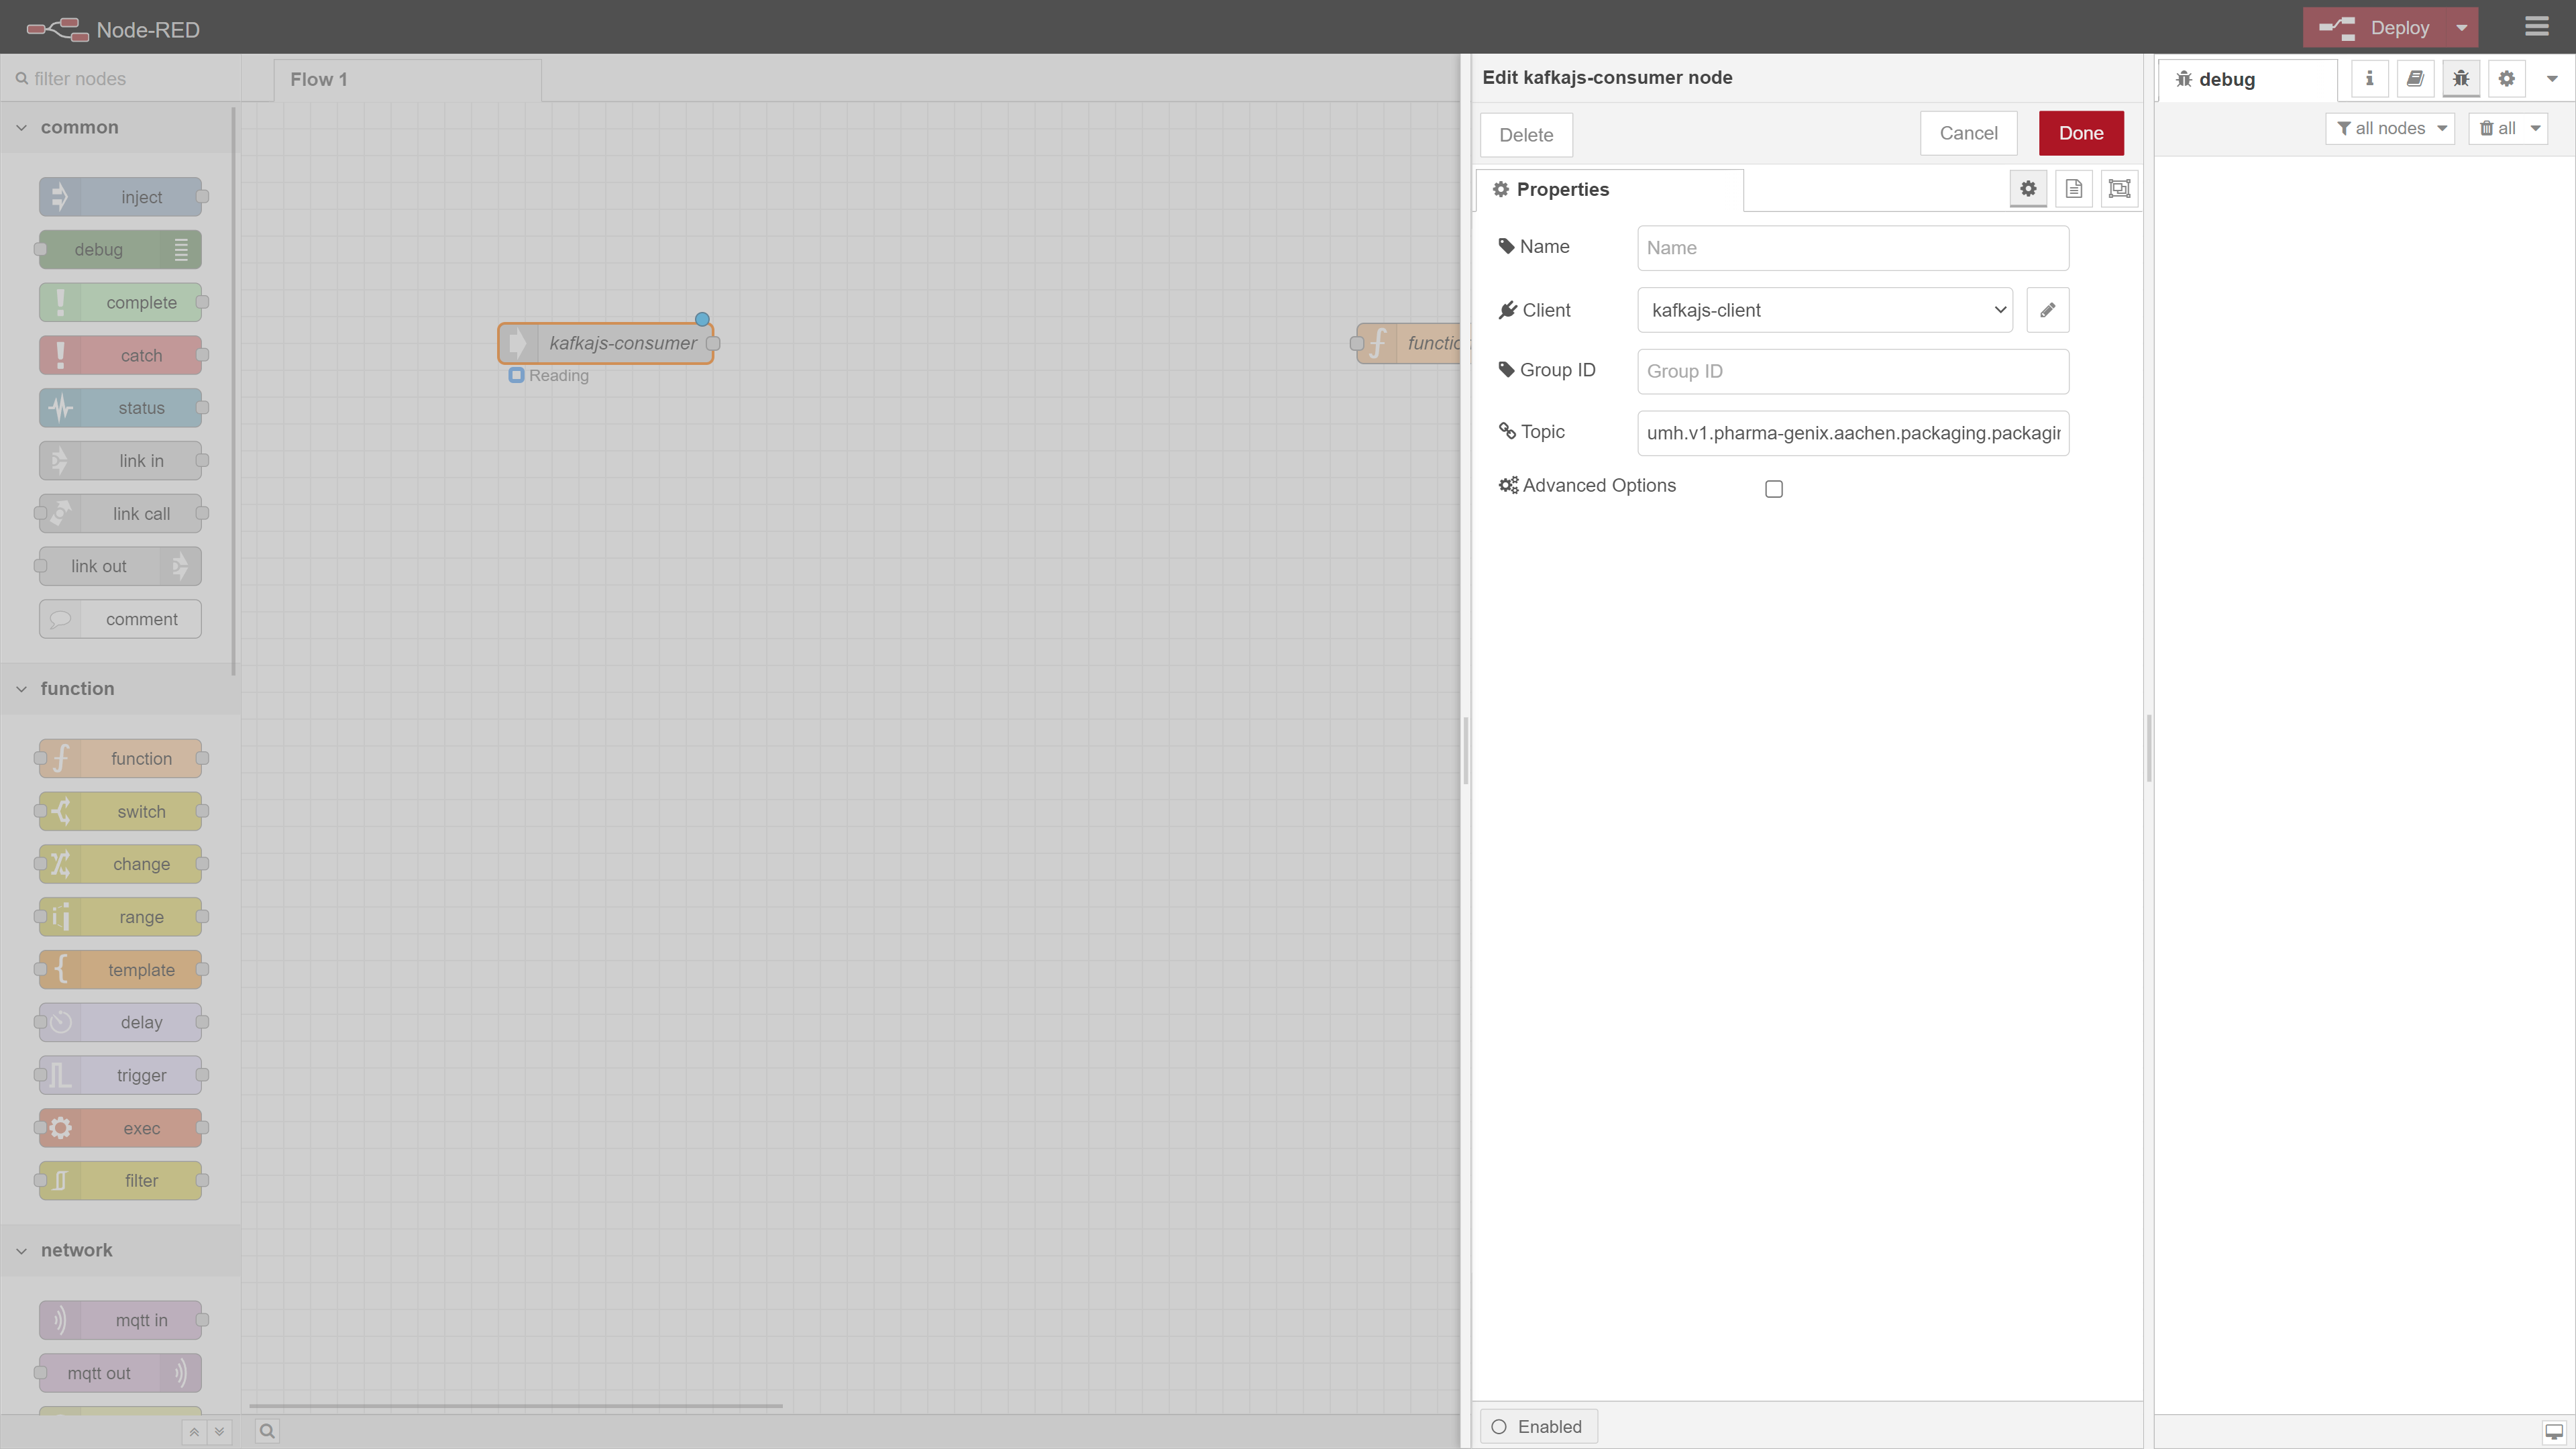
Set the subscription topic. For demonstration, we’ll use the topic created earlier:
umh.v1.pharma-genix.aachen.packaging.packaging_1.blister.PLC13._historian.temperatureCelsius
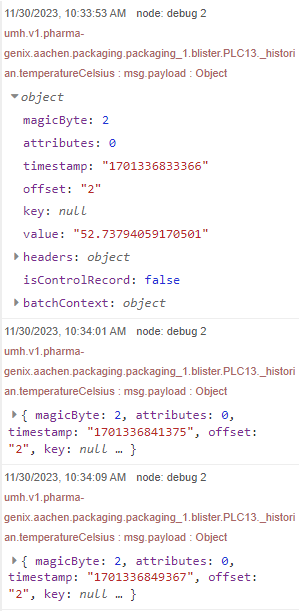
Link a debug node to the kafka-consumer node, deploy, and observe messages in the debug pane.
For topic structuring guidelines, refer to Unified Namespace.
Format Incoming Messages
Since the data is already processed from the previous step, use a function node to convert the temperature from Celsius to Fahrenheit. Connect it to the kafka-consumer node and paste the following script:
const payloadObj = JSON.parse(msg.payload.value)
const celsius = payloadObj.temperature
const fahrenheit = (celsius * 9 / 5) + 32

msg.payload = {
    "timestamp_ms": Date.now(),
    "temperature": fahrenheit
}

return msg;
Finalize with Done.
Then, connect a JSON node to the function node to parse the object into a string.
Send Formatted Data Back to Kafka
Now, we’ll route the transformed data back to the Kafka broker, in a different topic.
Add a kafka-producer node, connecting it to the JSON node. Use the same Kafka client as earlier, and the same topic for output:
umh.v1.pharma-genix.aachen.packaging.packaging_1.blister.PLC13._historian.temperatureFahrenheit
For more on UMH data modeling, consult the documentation.
Press Done and deploy.
Consider adding a debug node for visualizing output data.
What’s next
Next, we’ll dive into Data Visualization, where you’ll learn to create Grafana dashboards using your newly configured data sources. This next chapter will help you visualize and interpret your data effectively.